Vibe Coder · Unit 20: Image Models: Flux, ComfyUI and LoRAs · Lesson 7 of 7
Using your LoRA
Load your LoRA in ComfyUI, set its strength, test it fairly against the base model, and turn the result into a repeatable image pipeline for your product.
Read the short notes and pictures.Do everything inside a blue frame.
From a file to a result
Training gives you a file ending in .safetensors. On its own it does nothing. It has to be loaded on top of the same base model it was trained on, and then tested, because a LoRA that looked fine in the trainer’s samples can still fail in real prompts.
Loading it in ComfyUI
Put the file in place
Copy it to ComfyUI/models/loras/ and refresh.
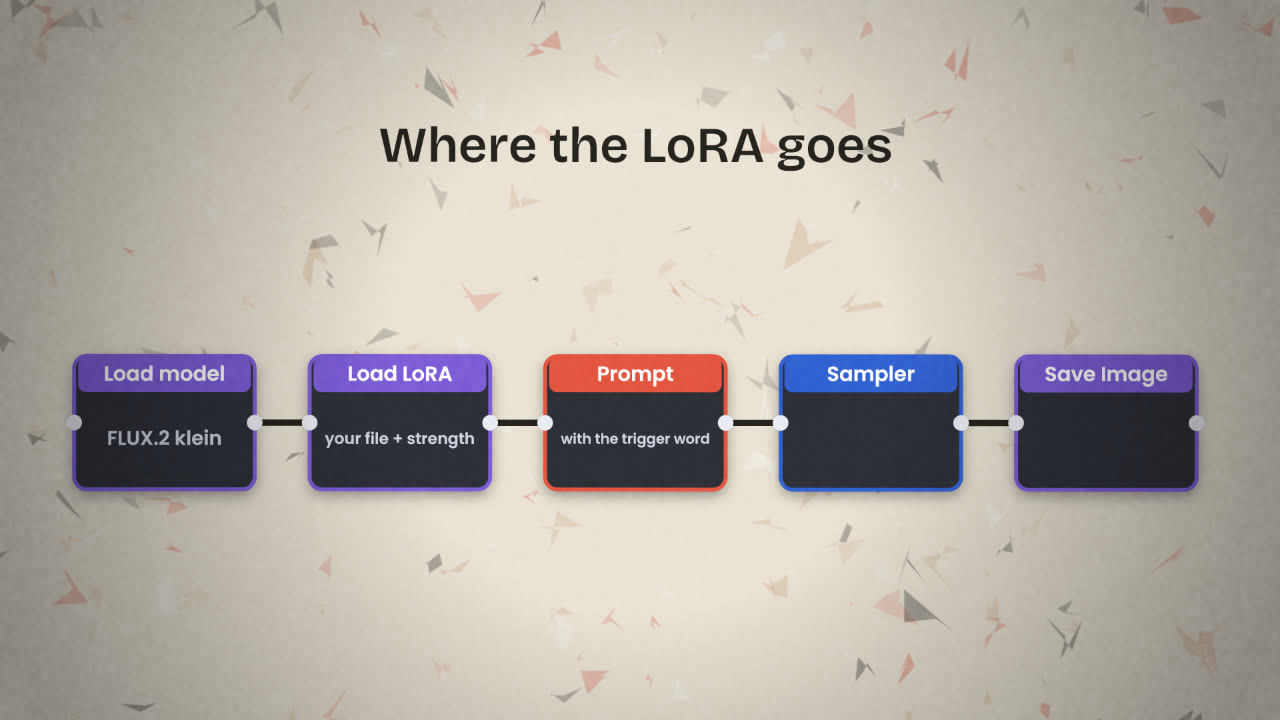
Add a Load LoRA node
It sits between the model loader and the sampler, so the model passes through it.
Choose your file and a strength
Start at a moderate strength and adjust from there.
Use the trigger word
Write it in the prompt exactly as it appears in your captions.
Strength
Strength is how much the LoRA’s weights are allowed to change the base model. There is no correct number, only the right one for your LoRA and your prompt.
Too low
The subject is only partly there, or looks generic.
About right
The subject is clearly yours, and the scene still follows the prompt.
Too high
Stiff poses, repeated backgrounds, harsh detail: the training photos showing through.
A fair test
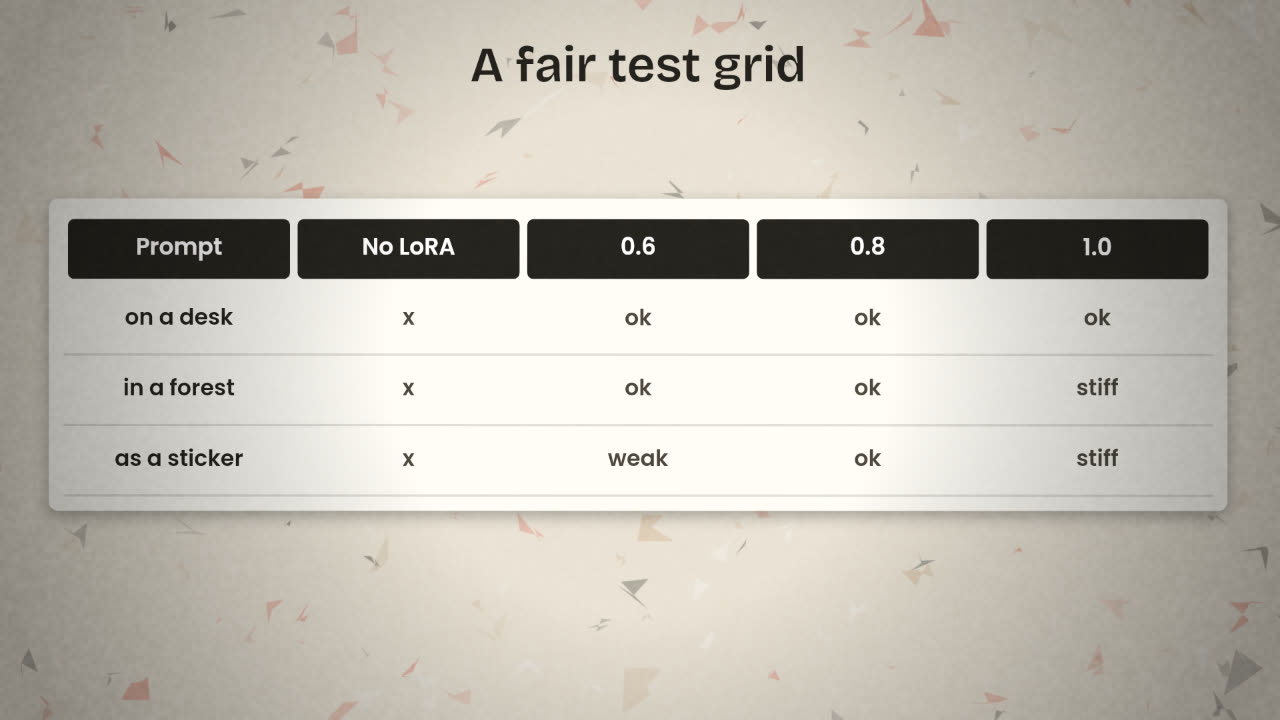
Do not judge a LoRA from one lucky image. Build a small grid: a few prompts, a fixed seed for each, run with no LoRA and with the LoRA at several strengths. Looking across the row shows what the LoRA adds. Looking down the column shows whether it generalises.
Prompts close to the training data
It should do these easily.
Prompts far from it
A new setting, a new style, a different camera angle. This is the real test.
Prompts without the trigger word
The subject should not appear. If it does, the LoRA is leaking into everything.
Write down what you see
A short note per cell. You are building evidence for which strength to ship.
A pipeline, not a lucky picture
What you are building for your product is a repeatable way of making on-brand images: the base model, your LoRA at a chosen strength, a prompt template with blanks for the scene, and the workflow that ties them together. Anyone on your team can then produce the next image, and it will match.
Prompt template
photo of ohwx mug [SCENE],
[LIGHT], clean editorial product
photography, shallow depth of field
Filled in
photo of ohwx mug on a cafe counter
beside a window, soft overcast light,
clean editorial product photography,
shallow depth of field
Your grid shows the subject appearing even in the "no trigger word" row. What does that tell you, and what would you do?
Publish your brand image kit
Load your LoRA, run a test grid, choose a strength, and produce the final images from your brief. Then put the kit in your product’s GitHub repository: the final images, the saved workflow, the prompt template, the caption files, and a short README.
Done when
Leave the LoRA file itself out of the repository if it is large. Say in the README where it is kept.
Keep these
- Load the LoRA after the model and use the trigger word.
- Test with fixed prompts and seeds, with and without it, at several strengths.
- Save the workflow and a prompt template: that is your pipeline.